

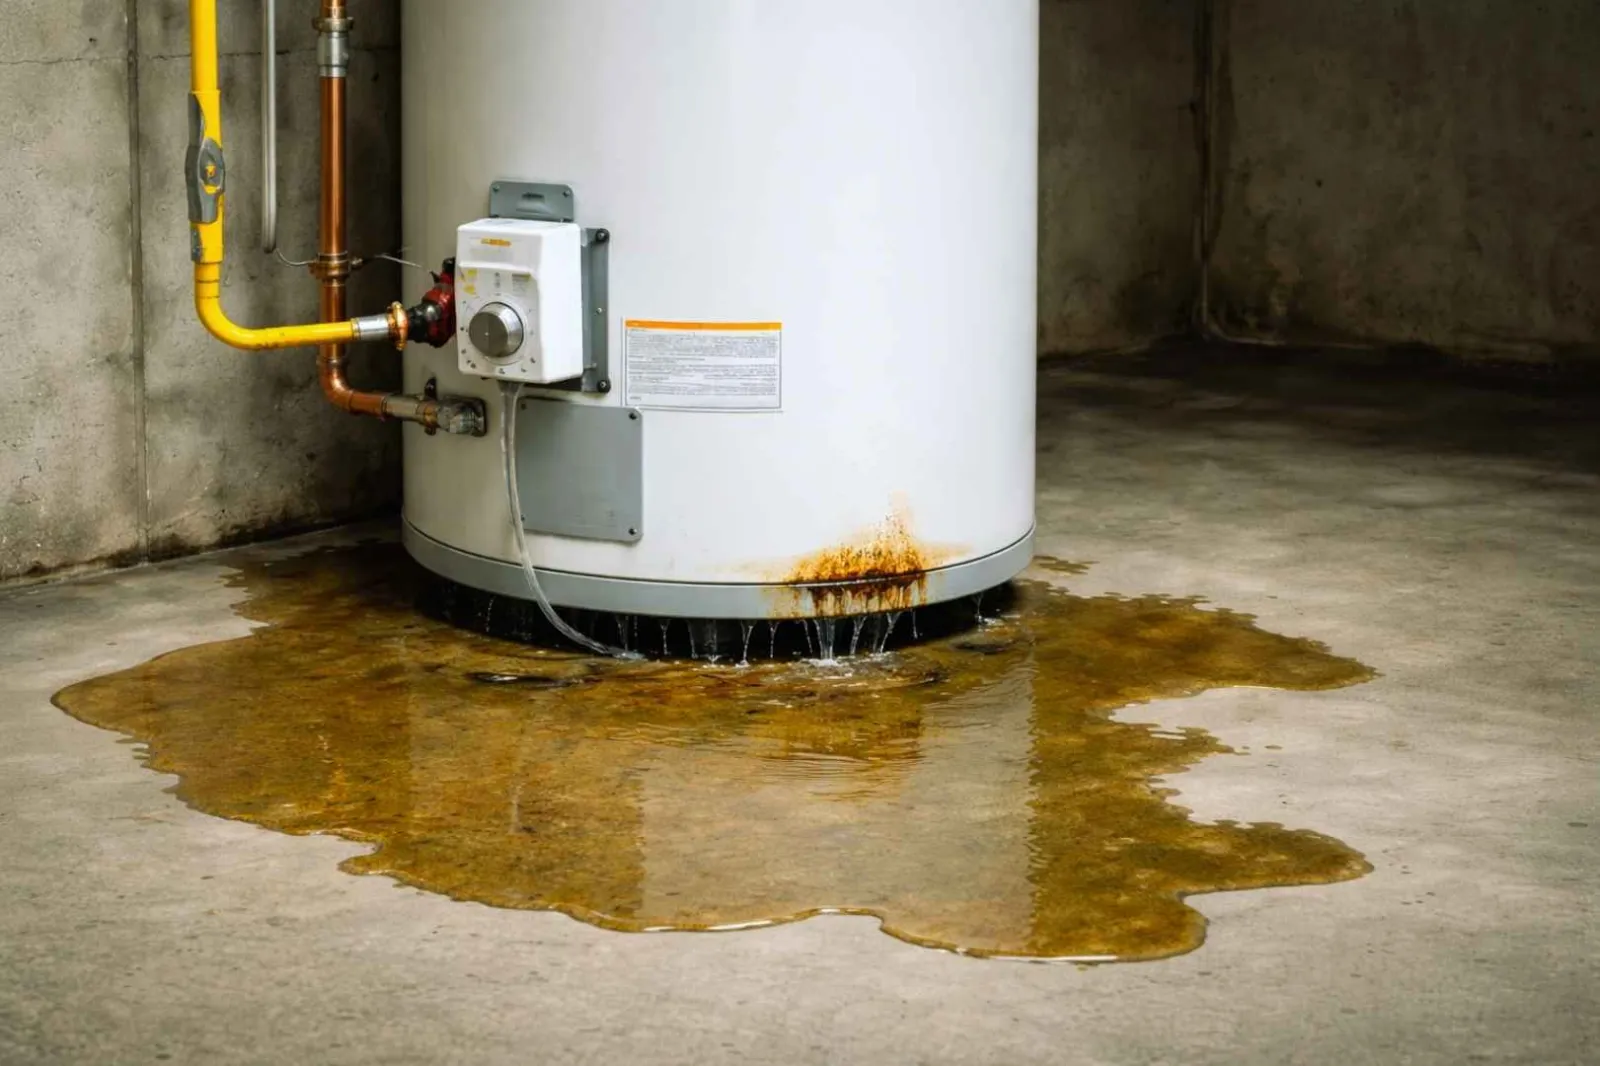
If you've discovered a puddle of water around the base of your water heater, you're facing one of the most urgent plumbing emergencies homeowners encounter. A water heater leaking from the bottom can waste hundreds of gallons of water per day, cause thousands of dollars in water damage to floors, walls, and belongings, and in severe cases, create flooding that impacts multiple rooms. The critical question isn't just "why is it leaking?" but "can it be fixed, or does the entire unit need replacement?"
After diagnosing thousands of water heater leaks since 1923, our licensed plumbers know that when water pools at the base of a water heater, most homeowners immediately panic and assume they need a replacement. In reality, about 40% of bottom leaks can be repaired by replacing a drain valve or tightening connections. However, the other 60% do require replacement because the tank itself has failed. Here's how to identify which situation you're facing and what to do immediately to prevent further damage.
CRITICAL: Emergency Steps Before Diagnosing
Before attempting to identify the leak source, you must shut down your water heater to prevent flooding and safety hazards:
For electric water heaters:
- Go to your electrical panel and flip the breaker labeled "Water Heater" to OFF position
- Water heaters operate on 240-volt circuits. Never touch the unit while the power is on
- Confirm power is off by checking that the indicator lights on the unit are dark
For gas water heaters:
- Turn the gas control dial on the unit to "OFF" or "PILOT" position
- Do NOT attempt to relight if you smell gas. Evacuate and call the gas company
- Ensure adequate ventilation in the area
For both types:
- Locate the cold water shutoff valve on the pipe entering the top of the water heater
- Turn the valve clockwise to shut off the water supply to the heater
- Open a hot water faucet anywhere in your home to relieve pressure in the lines
- Place towels, buckets, or a wet-dry vacuum around the leak to contain water
Once you've secured the immediate situation, you can safely diagnose the leak source.
Critical Diagnostic Principle: Water Flows Downward
Here's what most homeowners miss: a puddle at the base doesn't automatically mean the tank itself is leaking. Water always flows downward along the path of least resistance. This means a leak originating from a component at the top or side of your water heater can run down the exterior of the tank and pool at the bottom, creating the false impression that the tank base is leaking.
Before assuming tank failure (the worst-case scenario), check components above the unit that commonly leak and allow water to flow downward. Use a flashlight and dry paper towels to carefully inspect from top to bottom, wiping each component dry and checking for moisture reaccumulation after a few minutes.
Check these components first (top to bottom):
- T&P relief valve and discharge pipe: Located on top or upper side of tank with a pipe leading to the floor, check the valve body and pipe end for drips
- Cold water inlet and hot water outlet connections: At the very top, where pipes connect to the tank, feel for moisture around fittings
- Anode rod port: Hex-head plug on top of tank, check for corrosion or moisture
- Tank jacket seams: Where metal panels connect, look for rust stains indicating internal leaks traveling outward
If you find moisture at any of these higher points, the water is running down from there, not leaking from the bottom. Only after ruling out top- and side-leaks should you suspect bottom-origin leaks.
5 Causes of Water Heater Leaking From Bottom - Ranked by Frequency
Based on hundreds of water heater leak diagnoses we've completed throughout North Metro Atlanta, here are the five actual bottom-origin leak causes, ranked from most to least frequent:
1. Drain Valve Leaking or Loose (40% of Cases)
What's happening: The drain valve is the spigot-style fitting at the bottom of your water heater, used to flush sediment or drain the tank. Over time, the valve's internal washer wears out, sediment prevents a tight seal, the valve body cracks (common with plastic valves), or the threaded connection loosens. Any of these failures can cause a steady leak.
How to identify a drain valve leak:
-
Water drips or flows directly from the valve spout or around the threaded base
-
Leak is constant, not intermittent
-
Moisture is clearly visible at the drain valve
-
Tightening the valve slightly may slow or stop the leak temporarily
-
Water heater is 5+ years old
Why drain valves fail:
-
Plastic valves become brittle and crack from heat cycling
-
Internal washers deform under constant pressure
-
Sediment buildup prevents the valve from sealing fully
-
Brass valves corrode in hard water
-
Threads strip from over-tightening during maintenance
Solution: If tightening the valve briefly stops the leak, monitor it closely, but expect the leak to return. A leaking drain valve should be replaced. This involves draining the tank below the valve, removing the old valve, sealing the threads with Teflon tape, and installing a durable brass replacement. While experienced homeowners may attempt this repair, improper installation can lead to severe flooding when the tank refills. Our licensed plumbers replace failing drain valves with long-lasting brass upgrades rated for 15-20 years, compared to the 5-7 year lifespan of plastic valves.
2. Internal Tank Failure - Corrosion or Cracks (35% of Cases)
What's happening: This is the worst-case failure: the steel tank itself has corroded, rusted through, or cracked. Water leaks directly through the tank wall or bottom, saturates the insulation, and exits from the base or lower seams of the outer jacket. Internal tank failure is not repairable; the water heater must be replaced.
How to identify internal tank failure:
-
Water leaks from the bottom seam or base of the unit
-
Drain valve, T&P valve, and plumbing connections have been ruled out
-
Rust stains appear on the lower portion of the tank jacket
-
Water heater is 10+ years old (typical lifespan: 8-12 years)
-
Leak worsens over time, not improved by tightening valves
-
Rusty or metallic-tasting hot water
-
Long-term lack of sediment flushing
Why water heater tanks fail: Sediment buildup is the primary cause. In hard-water areas like North Georgia, minerals settle at the bottom of the tank, forming an insulating layer that forces heating elements or burners to overheat. This creates hot spots that crack the tank's protective glass lining. Once exposed, the steel tank rapidly corrodes. Tank failure also accelerates when the sacrificial anode rod, designed to corrode instead of the tank, is depleted (usually after 5-8 years), which most homeowners never inspect or replace.
Solution: An internal tank failure requires a full replacement of the water heater. Patching or sealing a leaking tank is unsafe and ineffective. Replacement involves draining and removing the old unit, installing new water connections, and testing for leaks. Gas water heaters also require proper gas line connection and venting inspection. Professional installation is strongly recommended to prevent flooding, gas leaks, and code violations. When replacing, consider upgrading to a longer-warranty tank (10-12 years) or a tankless system if it suits your home's needs.
3. Temperature & Pressure Relief (T&P) Valve Dripping (15% of Cases)
What's happening: Although the temperature and pressure (T&P) relief valve is mounted on the top or side of the water heater, its discharge pipe runs down to within 6 inches of the floor. When the valve activates or fails, water exits the pipe and pools at the base of the unit, making it look like the tank is leaking from the bottom. The T&P valve is a critical safety device that releases water when the temperature exceeds 210°F or the pressure exceeds 150 PSI, preventing tank rupture or explosion.
How to identify a T&P valve issue:
-
Water is pooling directly beneath the discharge pipe
-
The end of the discharge pipe is wet or actively dripping
-
Leaking is intermittent, not constant
-
Occasional hissing or steam near the pipe
-
Water heater temperature is set above 140°F
-
Home has a closed plumbing system with no thermal expansion tank
Why T&P valves leak or activate: The valve may be doing its job by relieving excess pressure caused by thermal expansion in a closed system. In other cases, the valve itself is failing, or internal corrosion, scale buildup, or sediment can prevent it from sealing fully. Excessively high temperature settings can also trigger legitimate discharge.
Solution: Set the water heater temperature to 120-130°F and monitor for continued discharge. Homes with pressure-reducing valves or check valves require a thermal expansion tank to absorb pressure increases. If the T&P valve is faulty or continues to leak, it must be replaced. Never cap, plug, or disable a T&P valve; doing so creates a serious explosion hazard. Testing or replacement should be done carefully, as debris can cause a valve to leak after activation. Our licensed plumbers can safely test and replace T&P valves and install expansion tanks to prevent recurring pressure relief.
4. Loose Cold Water Inlet or Hot Water Outlet Connections (7% of Cases)
What's happening: At the top of the water heater, the cold-water inlet and hot-water outlet connect to the tank using threaded fittings, dielectric unions, or flexible connectors. Over time, these connections can loosen, corrode, or fail. When they leak, water runs down the exterior of the tank and collects at the base, creating the illusion of a bottom leak.
How to identify a top-connection leak:
-
Moisture is found at the inlet or outlet fittings when checked with dry paper towels
-
Leak is slow, dampness or minor seepage rather than steady dripping
-
Corrosion, white mineral buildup, or rust staining is visible at the connections
-
Leak began after recent plumbing or water heater work
-
Home has hard water, accelerating corrosion
Solution: Carefully tighten the connection using two wrenches, one to hold the tank fitting steady and one to turn the pipe or connector. Tighten only about a quarter turn; over-tightening can strip threads or crack fittings. If the leak persists, the dielectric union or flex connector must be replaced, or the threaded joint disassembled, cleaned, resealed with fresh Teflon tape, and reassembled. If corrosion has caused pinhole leaks in the pipe near the connection, the damaged section must be cut out and replaced. Professional diagnosis helps determine whether a simple adjustment is sufficient or if replacement is required. Our plumbers use specialized water-heater tools to repair or replace leaking connections without damaging the tank or surrounding plumbing.
5. Condensation (Not an Actual Leak) (3% of Cases)
What's happening: What looks like a water heater leak may actually be condensation forming on the outside of the tank. This is most common with gas water heaters in cool, humid spaces like basements, garages, or crawl spaces. When warm, humid air contacts the cooler tank surface, moisture condenses and drips to the floor, mimicking a leak.
How to identify condensation:
-
Moisture appears intermittently, often during humid weather or temperature swings
-
Water amount is minimal, dampness rather than pooling
-
Water heater is located in a cool, humid environment
-
Issue is more common in summer or after heavy hot-water use
-
No visible leak source after thorough inspection
-
Tank exterior feels cool and damp
Solution: Dry the tank and the surrounding floor completely, then monitor for several hours under different conditions. If moisture returns only during high humidity or heavy usage, condensation is the cause. Reduce humidity by improving ventilation, running a dehumidifier, or relocating the unit to a conditioned space. Electric water heaters can be insulated with a tank blanket (do not insulate gas units). While condensation doesn't require water heater repair, persistent moisture can lead to jacket corrosion, so addressing the humidity issue is important.
The Bottom Line on Water Heaters Leaking From the Bottom
If your water heater is leaking from the bottom, the cause is usually one of two things: a failed drain valve (about 40% of cases, often repairable) or internal tank corrosion (about 35% of cases, requiring replacement). The first step is to shut off the water and power to prevent flooding, then inspect the unit from top to bottom to confirm the leak isn't coming from a higher component and running down the tank.
Accurate diagnosis is critical. Replacing a water heater when a drain valve repair would fix the issue wastes money, but repairing components on a 10-12-year-old tank with internal corrosion only delays inevitable failure.
Water heater leaking from the bottom? Contact our licensed plumbers for fast, accurate diagnosis and honest repair-versus-replacement recommendations in Cumming, Alpharetta, Roswell, and North Metro Atlanta. We offer same-day emergency service for active leaks and transparent pricing on all repairs and replacements.


